Getting Started
Overview
Welcome to Share Link! This section of the documentation will help you get started quickly and easily with adding your first Widget (that's the name we give the elements generated by Share Link that you can add to your page) to your website.
Before we dive into the data side of things we do need to make sure your Share Link account is configured correctly to properly display widgets.
Website Domains
Your Share Link subscription includes the use of Share Link data on your website plus any staging or development websites you may have. To enable this you need to tell Share Link what domains your account users.
From the left hand menu click Settings then Configuration.
You will see your license code (used for registering Share Link with CMS plugins). Click the domains tab. Here you will see a list of domain textboxes. The first one should reflect the domain you entered when you signed up. Add any additional domains (including local development and staging domains) to this list so you can view your Share Link data on these sites as well as your production one. If you are unsure on any of this, contact your website developer however as long as you have your website domain/URL listed here then your Share Link data should display on your site.
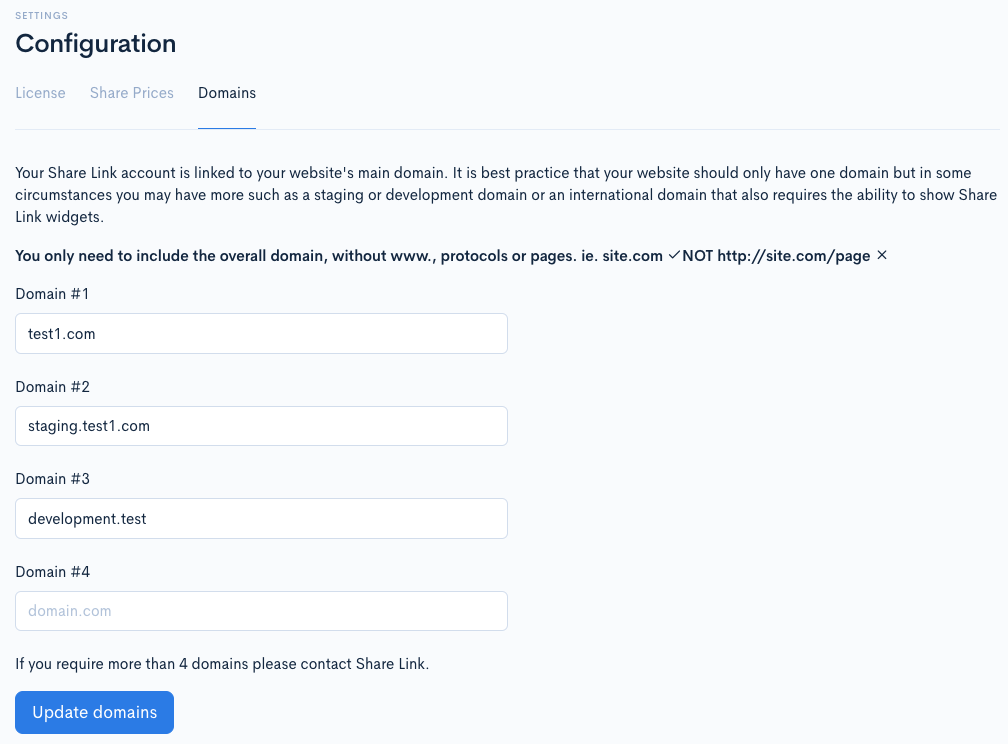
Widgets will only display on websites using the domains you enter here. Make sure all your website domains are included (eg. site.com, site.com.au, staging.developer.com and dev.test) with no www. or protocols such as https://.
Once you are happy with the list, click the "Update domains" button to save the changes. Now, lets get onto creating our first widget...
What is a widget?
A widget is simply a component you build using our application that you are able to then display on your website. This could be a share price box, a historical pricing graph, a list of company announcement or more.
We have a library of available widgets which can be fully customised to match the branding and feel of your website.
You will only see the widgets available based on the level of your plan.
Create a widget
Share Link contains a library of widget templates for the different types of data it can display. You select a template then customise it to show the data you want, and style it to match your website and corporate branding.
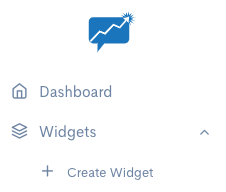
To view all the available widget templates (available based on your plan) from your Dashboard select the widgets button on the main menu on the left and click the + create widget button:
We are going to create a basic share price widget in this tutorial so lets start by filtering the list of available widget templates down to those that display share prices. Click the "show all types" menu and select "Share Price".
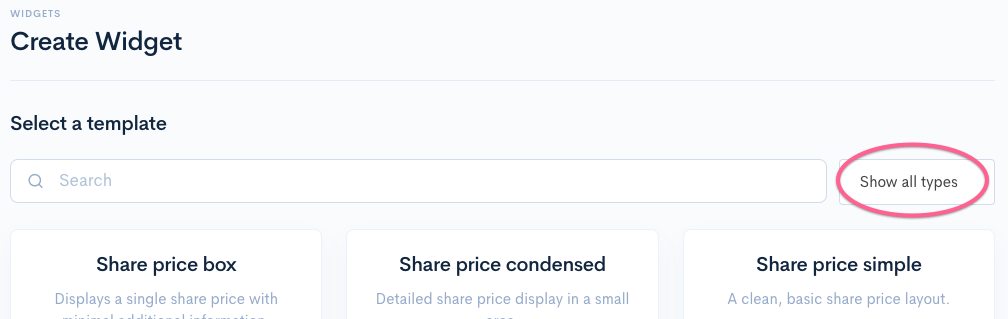
If you are on the gold or silver plan, the number of available widgets will now reduce to just those that involve share price display, bronze plan subscribers will see the same list, as you only have share price widgets available.
You can also use the search bar to find specific widget templates, try typing box and you should see the results reduce again to show just our "Share price box" template. This template displays the current share price and optionally additional information such as previous close, change direction, open, high, low etc. Simply click on it to select it. You can now customise the data it shows and how it looks.
Widget Configuration
Once you have selected the kind of widget you want to build you can configure it (update the data shown and how that data is displayed) and customise it (change the styles including colours and fonts) to make it fit in with your website.
You can configure the widget by editing the options on the left side of the widget creation page. A live preview of the widget you are building is displayed on the right hand side of the page (with test data until you finalise the widget build).
All widgets require a unique title. This is how we will refer to this particular widget throughout the rest of the Share Link application (and in the Wordpress plugin). Let's call this one Demo Widget.
The share price box we have selected is a simple widget with only a few configuration options. You can choose whether or not to include the share prices' currency and wether or not to include additional price related data as part of the widget. Click the options on the left and watch how the preview updates.
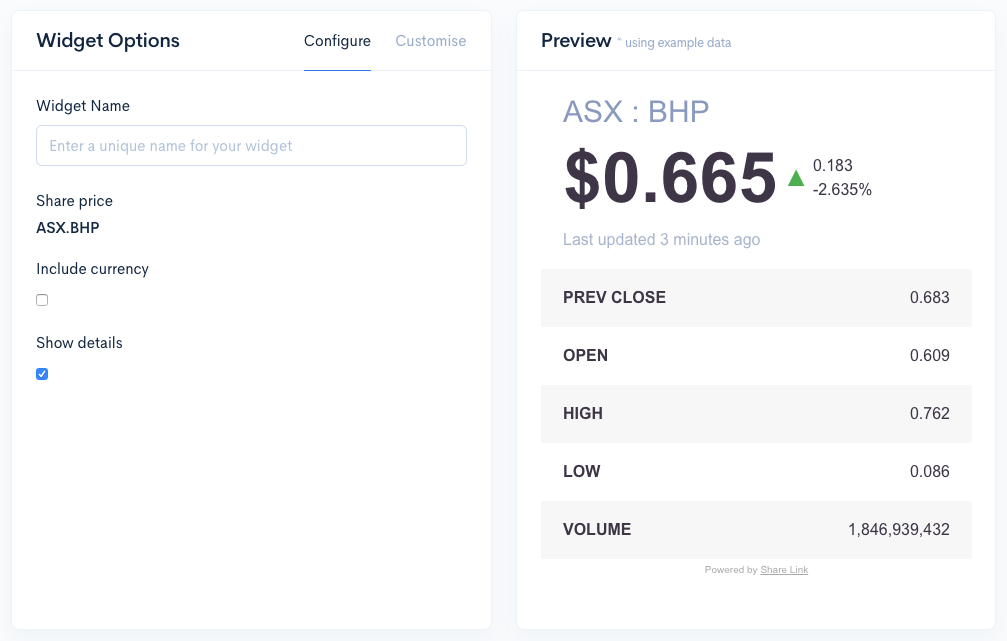
Once you are happy with the configuration you can move onto customising the look of the widget or click "Save Widget" to complete the widget creation process.
Widget Customisation
You can change almost every aspect of a widget's look via the "customise" tab on the create widget page. Click "customise" to see the available options.
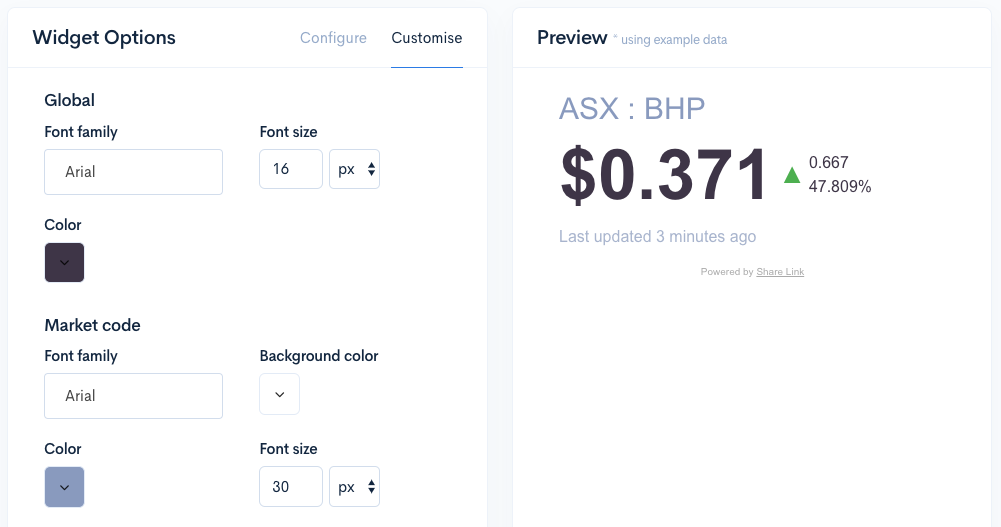
The customisation options are broken into sections that relate to specific areas of the widget. Lets change the look of the market code text at the top of our widget.
Under "market code" click on the "Font family" drop down and choose a font that matches your website - we chose "Aresenal" as it is significantly different from the default font, then (still under market code) we changed the colour to red and the font size to 16px. See how the result is automatically reflected (with demo data) in the preview box?
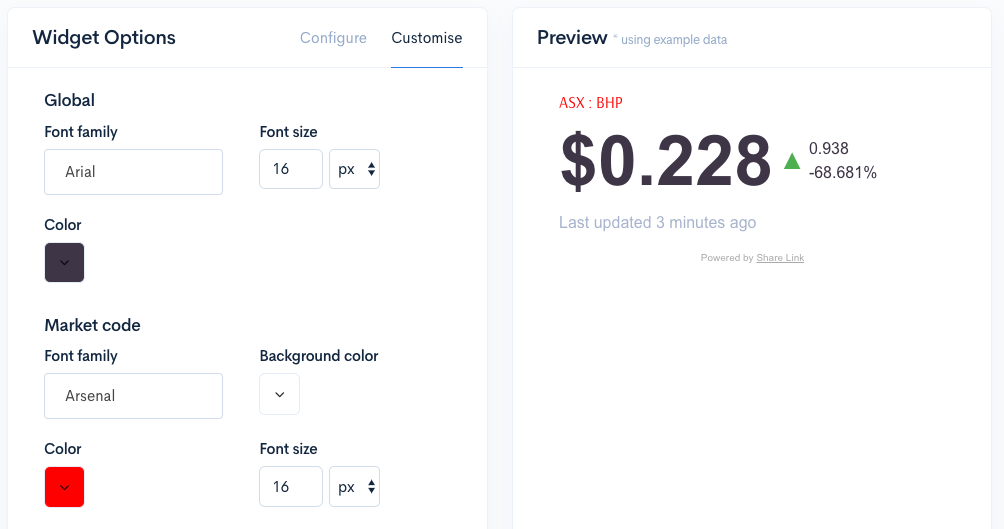
You can continue modifying other elements of your widget until it suits your requirements. Once you are happy with the customisation of your widget, click save widget (at the very bottom of the page).
At this point Share Link will download any actual real data (which may take some time, dpeending on the widget and data used) and process your widget so it is optimised and ready to be used on your website.
Embed Widget
Upon successful save you will be taken to the details page for your new widget. A brief "loading" message will be displayed while Share Link replaces the example data with your real company data - for widgets that have a lot of data you can feel free to leave this screen and do other things while the data imports and come back later. This process is only required the first time you create a widget.
Now we are ready to add the widget to our website, known as "embedding". If you are familiar with adding youTube videos to your website, the process is the same.
With a preview of our Demo Widget on screen click the "Embed" tab. This will show you the different options for placing the widget in your site.
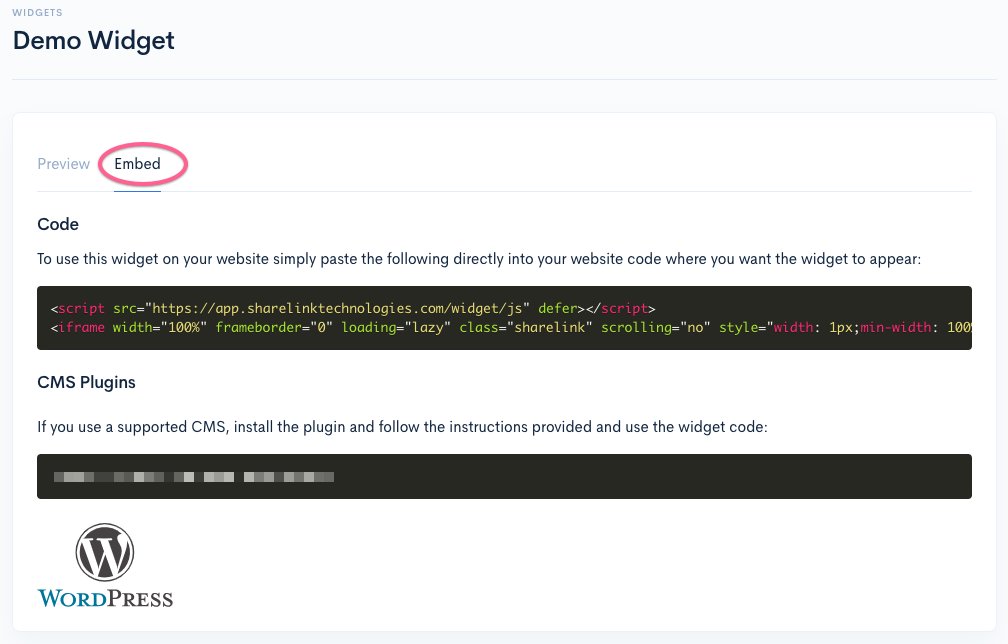
If you are using Wordpress as your CMS we recommend using the Share Link Wordpress plugin which you can download here and contains further instructions on embedding widgets into your site easily via the Wordpress admin.
Otherwise you can copy and paste the code in the Code field directly into your website code or CMS - instructions for doing this will vary from system to system but if you are not familiar with this process try looking for instructions on embedding youTube videos for your CMS or alternatively contact Share Link support and we will assist you.
And that's it! Your share link widget should now be displayed on your website.
Next Steps
Now you've learnt to build a basic widget you can try your hand at some more advanced widget building - silver and gold users can try share price history graphs and ASX Announcement tables.
Share Link also integrates with some third-party email newsletter systems and social media so you could try adding MailChimp support or sending a Tweet each time your company releases an announcement to market (gold subscribers only!).